Updated April 30, 2023
If you have old oak cabinets in your kitchen or bathroom that could use an upgrade, you're likely asking yourself whether you should remove and replace the entire cabinets altogether or go to the effort to refinish or reface them. Deciding which of these options is best for you will depend on a few considerations, like whether or not you are satisfied with your cabinet's footprint and functionality, your budget, and the look and feel of the rest of your home.
In this article, we'll discuss:
Find interior demolition pros to remove your cabinets
What Is Cabinet Refinishing?
Cabinet refinishing involves keeping your existing cabinet boxes and doors, and stripping off the paint or stain so you can stain or paint the cabinets whatever color you choose.
How to Refinish Cabinets
The steps to refinishing cabinets are not overly complicated, but we strongly advise against cutting any corners to ensure that all of your hard work not only turns out beautiful and well-done but also lasts for years to come.
Step 1: Prep the Area
The first step to refinishing cabinets is emptying the cabinets completely, clearing off the counters of clutter, relocating nearby appliances and furniture, masking/taping off the backsplash and walls, and setting up a cleaning and painting station.
An easy DIY cleaning and painting station could be as simple as spreading a couple 2x4s between two ladders, screwing hooks into the corners of the top edges of upper cabinet doors and the bottom edges of lower cabinet doors, then screwing corresponding eye hooks into the 2x4s. This will enable you to hang the cabinet doors from the 2x4s so you can paint both sides at once and let them fully dry with less risk of disturbing the fresh paint.
Prepping in this way will ensure that your work area is organized so you can efficiently complete your project without making a mess or getting paint where it doesn't belong.
Step 2: Remove Cabinet Doors and Drawers
The next step to refinishing your cabinets is to remove the doors and drawers. Not only does removing the doors and drawers make it easier to thoroughly clean them, but it also makes painting or staining them much easier as well. So while you may be tempted to save time and leave the doors and drawers attached so you can clean and paint them where they are, this is a recipe for disaster. Think: Dripping paint, uneven coverage, and an overall unprofessional look that can actually decrease your home's value.
As you remove each cabinet door and drawer—working top to bottom, left to right—put a numbered piece of tape on the upper edge of upper cabinets, the lower edge of lower cabinets, the bottoms of drawers, and the edges of cabinet shelves so you remember where everything goes.
Now is also a good time to remove all hinges and hardware.
After removing the doors, drawers, and hardware, we recommend placing them by your cleaning and painting station so they're organized and ready to go. A well-planned work station will improve your work flow and allow you to streamline the process, which means you'll not only finish faster but you'll also have more consistency in your painting.
Step 3: Clean Cabinets and Cabinet Doors
Whether you have wooden or composite cabinets, cleaning them is not complicated.
To clean cabinet doors and and drawers, start by mixing a 50/50 solution of vinegar and warm water in a spray bottle, then add a few drops of liquid dish soap and gently shake to combine. This mixture will help to break down and lift any grime that has built up on your cabinets over the years.
Next, spray your cleaning solution onto your cabinet doors, drawer fronts, and cabinet box exterior surfaces, and let it sit for a few minutes. (You can balance the doors and drawers on top of your DIY cleaning and painting station to quickly work through this step.)
After the cleaning solution has had a chance to work, spray a soft cloth or sponge with the solution and start scrubbing down the cabinet doors, drawer fronts, hardware, outer cabinet box walls, and tops of cabinets.
Once all grime is removed, take a clean damp cloth and wipe down all cabinet surfaces to ensure there is no cleaner residue on the cabinets, and allow them to thoroughly dry.
Step 4: Prep Cabinets
The next step is preparing the cabinet surfaces for paint. If you jump immediately from cleaning your cabinets to painting them, the paint will peel off and cause you more headaches in the long run. If you use a sander to prep the cabinets, you can expect a dusty mess that can be difficult to clean up, leading to dust and wood particles in your paint. This is why we recommend using a liquid sander or deglosser to get the job done.
If you're relocating the hardware on your cabinets, you'll also want to fill the old screw holes at this time using a two-part polyester wood or autobody filler. Be sure to follow instructions closely, as these fillers set quickly.
The next part of the cabinet prep process is to lightly sand them using a foam sanding block. (Do not sand down to the wood.) This will give the primer something to stick to.
Once everything is lightly sanded, thoroughly vacuum to remove any bits of sanding dust that could show up in the primer or paint, then use a tack cloth to wipe everything down as a final measure.
Step 5: Prime Cabinets
Before you can paint a cabinet, you must first prime it. In most cases, oil-based primers or acrylic latex primers work just fine for this. However, stain-blocking primers are especially great at covering heavily stained cabinets, sealing knots and surface defects, and preventing anything bleeding through the paint topcoats.
We recommend using a brush to prime any edges and tight spots and a roller for the large flat surfaces. Start at the top of the cabinet and brush on the primer across the grain. Then, pass your brush lightly over the wet finish one time in the direction of the grain for a perfect finish.
Step 6: Sand, Caulk, and Fill Cabinets
Once the primer is completely dry, use 220-grit sandpaper to sand the flat areas, then sand any rough surfaces with a medium-grit sanding block to get the wood as smooth as possible.
Fill open seams with latex caulk and small dents, nicks, or scratches with vinyl spackle, then lightly sand again with 220-grit. Vacuum and wipe all surfaces down with a tack cloth again.
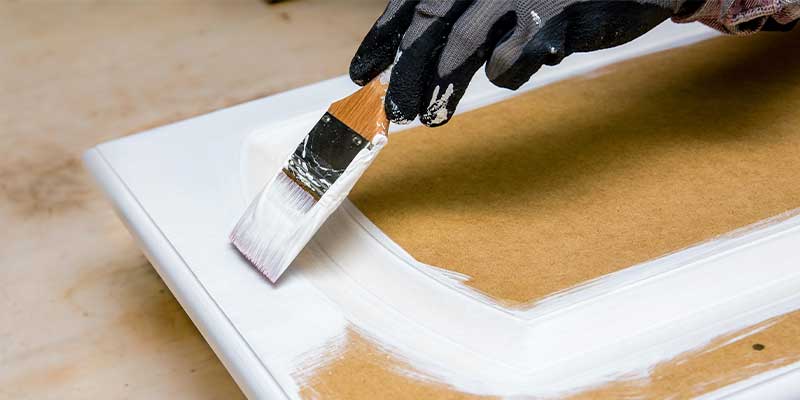
Step 7: Paint Cabinets
Now that your cabinet boxes, doors, and drawers are properly cleaned and prepped, it's time to paint them. If you’re using a shade that is close to the pre-existing cabinet color, you can likely get away with two coats, maybe even one. Painting over a dark finish with a lighter color on the other hand will likely require three coats. Don't forget to lightly sand between each coat (and clean up the resulting dust) and use a new brush for each coat to ensure a smooth and flawless finished product.
The best cabinet paint is usually semi-gloss, gloss, or satin as it looks beautiful, resists wear, and is easiest to clean.
Step 8: Put the Cabinets Back Together
Once the final coat is completely dry, remove the eye hooks from the cabinets, re-install the hinges and knobs/pulls, attach the doors and drawer fronts where they belong, and remove the tape from each door/drawer.
Learn more:
- Stop Putting Off Your Kitchen Remodel—Get Started Today!
- 15 of the Most On-Trend Kitchen Remodel Design Ideas
- 5 Ideas for Small Bathroom Remodels
Average Cost to Refinish Cabinets
How much it costs to refinish your cabinets will depend on how many cabinets you're refinishing, how many of the materials you already have, how many coats of paint it will take to cover your existing cabinet color, and whether or not you hire a pro to help you.
The average cost to refinish cabinets yourself is $200-$300, but your project may be more or less depending on the size and complexity of your cabinets and the cost of living and products in your area. The average cost to have a professional refinish your cabinets is $1,500-$5,000.
Pros and Cons of Cabinet Refinishing
Pros:
- Less expensive than cabinet refacing or cabinet replacing
- Restores the beauty of your existing cabinets
- Transforms the look and feel of your kitchen or bathroom
- Extends the life of your wood cabinets
Cons:
- Dust and debris from sanding cabinets can be hard to clean
- Fumes from the deglosser, primer, and paint can be unpleasant
- Takes a long time
DIY or Hire a Pro
This project may seem easy to some do-it-yourselfers, but to others, it may be an overwhelming and stressful project.
Many homeowners choose to refinish cabinets themselves because it seems simple and straightforward, but that's not necessarily the case. Oftentimes, DIYers end up with visible flaws in their paint job, like thin spots, drip marks, or pinhole bubbles. By opting to hire a professional to refinish your cabinets instead, you can rest easy knowing you'll end up with flawless cabinets without the stress or time of getting it perfect yourself.
Bottom line: Cabinet refinishing is a great option for people who aren't doing a total kitchen or bathroom remodel, and who also have the time, ability, and space to handle this often messy project. If you have any doubts in your ability to do a professional job refinishing your cabinets, we recommend saving yourself the time and stress and hiring a professional instead.
What Is Cabinet Refacing?
Cabinet refacing, sometimes referred to as "cabinet resurfacing," involves leaving the cabinet boxes where they are and the amount of cabinets as is, repainting, staining, or installing new veneer or laminate to your existing cabinet boxes, and then replacing the cabinet fronts and drawers. In most cases, the cabinet hinges and hardware are also replaced.
In order to be able to be refaced, cabinets must meet the following standards:
- Constructed of plywood or medium density fiberboard
- Surfaces are smooth and in good condition
- Internal hardware is in good condition
- Cabinet boxes are made of solid wood
If your cabinets do not meet these standards, we advise replacing them completely instead, as they likely will not hold up to being refaced.
How to Reface Cabinets
Step 1: Prepare Cabinets
Start by removing any and all contents from your cabinets and drawers so you have a clean slate to work with.
Then, remove all cabinet doors, drawers, drawer fronts, hardware, etc. (using tape to mark where each one goes) and thoroughly clean all surfaces. Use a 50/50 mixture of vinegar and water with a couple drops of grease fighting dish soap to remove any grease and oil from the cabinets. If your cabinets are especially dirty, it may be more efficient to opt for a more powerful solution, like Krud Kutter.
Once fully dry, it's time to lightly sand all exposed surfaces of the cabinets, doors, and drawers using a medium-grit sandpaper.
Then, vacuum up all the dust and wipe down surfaces with a tack cloth to ensure you've gotten it all.
Step 2: Strengthen Cabinet Frames
The next step to cabinet refacing is to ensure the cabinet frames themselves are strong and reinforced. This is achieved by adding plywood panels to the cabinet boxes.
Start by cutting plywood panels into 1/4-inch pieces so they fit the exposed ends of the cabinets, then apply carpenter glue, and press the plywood panels into place within the cabinets, securing them with 1-in. finishing nails.
Fill in any holes with wood filler, let dry, then lightly sand for a uniformly smooth finish.
Step 3: Cut and Apply Veneer
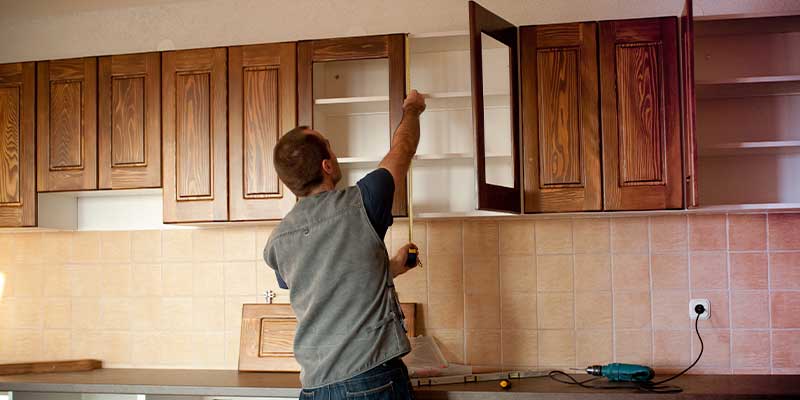
Record the measurements of all the horizontal pieces of the cabinets (rails) and all the vertical pieces of the cabinets (stiles), marking where the veneer pieces will go.
Next, cut the veneer into strips with the wood grain or pattern using a utility knife or straight edge razor and a ruler. To ensure your cuts are clean every time, replace your knife blade every few cuts.
Align your first piece so that it overhangs the edges of your cabinet's stile, peel away the backing, and press it into place. Press firmly down the length of the strip to force out any air bubbles and ensure a firm, even adhesion.
Repeat this step with the adjacent stile, then trim off the excess veneer from all edges of the stiles.
Next, you'll apply the veneer to the rails of the cabinet, making sure to overlap it with the stiles on both sides.
Using a carpenter square to line up the join of the pieces of veneer, cut both pieces of veneer with a utility knife and remove any excess pieces from the top and bottom, smoothing the edges back into place as you go.
Continue this process until the veneer facing is complete.
Step 4: Stain or Paint Doors and Drawers
Now that the veneer facing is done, it's time to stain or paint the doors and drawers to match.
If you’re using a shade that is close to the pre-existing cabinet color, you can likely get away with one or two coats. Don't forget to lightly sand between each coat (and clean up the resulting dust) and use a new brush for each coat to ensure a smooth and flawless finished product.
The best cabinet paint is usually semi-gloss, gloss, or satin as it looks beautiful, resists wear, and is easiest to clean.
Simplify the process for yourself by creating a DIY painting station: Spread 2x4s between two ladders or tables, install eye hooks to the tops of your upper cabinets and the bottoms of your lower cabinets so they can be hung up in a secure fashion for easy painting and fast dry times.
Step 5: Reassemble Cabinets
Once the final coat is completely dry, remove the eye hooks from the cabinets, re-install the hinges and knobs/pulls, and attach the doors and drawer fronts where they belong.
Average Cost to Reface Cabinets
How much cabinet refacing costs will depend on a number of factors, like how many cabinets you're refacing, how many of the materials you already have, how many coats of paint it will take to cover your existing cabinets, and whether or not you hire a pro to help you.
The average cost of refacing cabinets is $300-$500, but your project may be more or less depending on the size and complexity of your cabinets and the cost of living and products in your area. The average cost to have a professional reface your cabinets is $3,000-$10,000.
Pros and Cons of Cabinet Refacing
Pros:
- Less expensive than cabinet replacement
- Countless style options available
- Completely changes the look and feel of your kitchen or bathroom
- Extends the life of your cabinets
- A greener alternative to replacement
Cons:
- Doesn't allow for layout changes
- Dust and debris from sanding cabinets can be hard to clean
- Fumes from the adhesives, primer, and paint can be unpleasant
- Takes a long time
- Costs can add up
DIY or Hire a Pro
Refacing cabinets may seem relatively simple for some, but it can quickly become overwhelming and difficult for the average homeowner looking to upgrade their cabinets.
Many homeowners opt to reface cabinets themselves because it seems relatively easy, but that's not necessarily the case. It's easy for even experienced DIYers to end up with imperfections that a professional could easily have avoided. By choosing to hire a professional to reface your cabinets instead, you can put your feet up while they worry about making your cabinets perfect.
Bottom line: Cabinet refacing is a good option for people who are looking to change the look of their cabinets while saving some money during their kitchen or bathroom remodel. If you have any doubts in your ability to do a professional job refacing your cabinets, we recommend hiring a professional to handle it instead.
What Is Cabinet Replacement?
Cabinet replacement is as straightforward as it sounds and involves removing your existing cabinets completely so that new ones can be installed. Replacing cabinets includes removing the cabinet boxes, cabinet doors, drawers, and hardware, giving you a fresh slate to start with.
Cabinet replacement is most common during total kitchen or bathroom remodels when you plan on replacing countertops, backsplashes, or changing the layout. While it may be tempting to try and save money on your total remodel by simply refinishing or refacing your cabinets, it's not recommended as it's highly unlikely that the existing cabinets will avoid incurring damage during the remodel process.
How to Replace Cabinets
The cabinet replacement process is not complicated, but it is messy.
Step 1: Empty Cabinets
The first and most obvious step to replacing your cabinets is removing any items inside and storing them elsewhere for the time being.
Step 2: Remove Cabinet Doors, Shelves, and Drawers
Unscrew cabinet doors at the hinges and place to the side. Lift internal shelves up off the pegs they're resting on and place to the side. Cabinet drawers should be easily removable by manipulating the stop mechanism and pulling the unit straight out.
If metal or plastic brackets are holding the units together, unscrew them using the appropriate screwdriver.
Step 3: Remove Sink and Countertops
If you're replacing the cabinets in your kitchen or bathroom, it's safe to assume you'll need to remove the sink to replace your lower cabinet boxes. We recommend having an expert, like a plumber or contractor with experience, handle this part of the process, as a lot can go wrong if done improperly.
The water supply should be turned off, pipes and outlets should be kept upright, and any fixtures underneath the sink should be disassembled before cutting the sink's sealant and detaching it from the counter.
Then, the countertops can be removed by unscrewing any screws or bolts or cutting any sealant or glue holding them in place from below. Countertops are extremely heavy and require more than two people to safely remove them.
Step 4: Remove Cabinet Boxes
Starting with the lower base units, unscrew the fixings at the back holding the cabinets together. Once these are all removed, you should be able to gently pull the cabinet units away from the wall.
Next, remove the upper wall cabinets by loosening the screws on the brackets at each side and removing the screws connecting the cabinets together.
Then, lift up on the cabinet to remove it from the bracket. If your cabinet is screwed into the wall rather than a bracket, have a partner hold the cabinet's weight up while you unscrew it.
Step 4: Install New Cabinet Boxes
Once all the previous cabinets are removed, the area is vacuumed and it's time to install the new cabinet box replacements.
Installing cabinet boxes is not a simple project, and we strongly recommend hiring an expert to assist with this. They will be able to accurately locate high spots on your floor and wall studs and attach the cabinets evenly, safely, and efficiently.
Step 5: Install New Cabinet Doors and Drawers
Once the upper and lower cabinet boxes are in place, it's time to attach the doors and drawers.
Read more:
- Pros and Cons of Doing Kitchen Demolition Yourself
- Kitchen Demolition Cost Guide
- The Best Countertop Options for Kitchens and Bathrooms
Average Cost to Replace Cabinets
How much cabinet replacement costs will depend on a number of factors, like how many cabinets you're replacing, the materials you use, the cost of living and materials in your area, and whether or not you hire a pro to help you.
The average cost of replacing cabinets is $2,000-$8,000, but your project may be more or less depending on the size and complexity of your cabinets and the cost of living and products in your area. The average cost to have a professional replace your cabinets is $5,000-$15,000 or more.
Keep reading:
- Top 5 Go-To Tips for Budgeting Your Kitchen Remodel
- How to Budget Your Bathroom Remodel and Save Money
Pros and Cons of Cabinet Replacement
Pros:
- Endless design options allow you to get exactly what you want
- Allows you to improve the layout and footprint of your kitchen or bathroom
- Increases your kitchen or bath's functionality
- Increases your property value
Cons:
- More expensive than refinishing or refacing
- Requires hiring a professional in most cases
- You may need to replace the countertops
- Longer wait time to project completion
DIY vs Hiring a Pro
Removing cabinets for a cabinet replacement may be something you can do yourself if you have the physical ability, the time, and the desire to save some money. For example, you could remove your cabinets yourself, rent a dumpster to manage the debris, then hire a professional to install the new cabinets.
However, not everyone has the ability or the desire to safely and efficiently remove heavy cabinets, countertops, and sinks, in which case we recommend hiring an interior demolition contractor to assist with these removals.
Installing cabinets is always best left to the pros or to those experienced in this project. New cabinets must be precisely measured and installed perfectly level, especially lower base cabinets. If your base cabinets aren't properly leveled, it can cause items to roll off the counter, countertops to crack, and it simply doesn't look good.
Bottom line: Replacing cabinets in your kitchen or bathroom is a good option for people who are looking to change the layout and functionality of their existing cabinets while increasing their home's value. We recommend hiring a professional to handle cabinet installation, but removing your existing cabinets may be a project you can do yourself if you have the right safety equipment, physical strength, and partners to assist you.